DIY Engagement Photoshoot
Let’s chat about how to save money in your wedding planning process by doing your very own DIY engagement photoshoot!
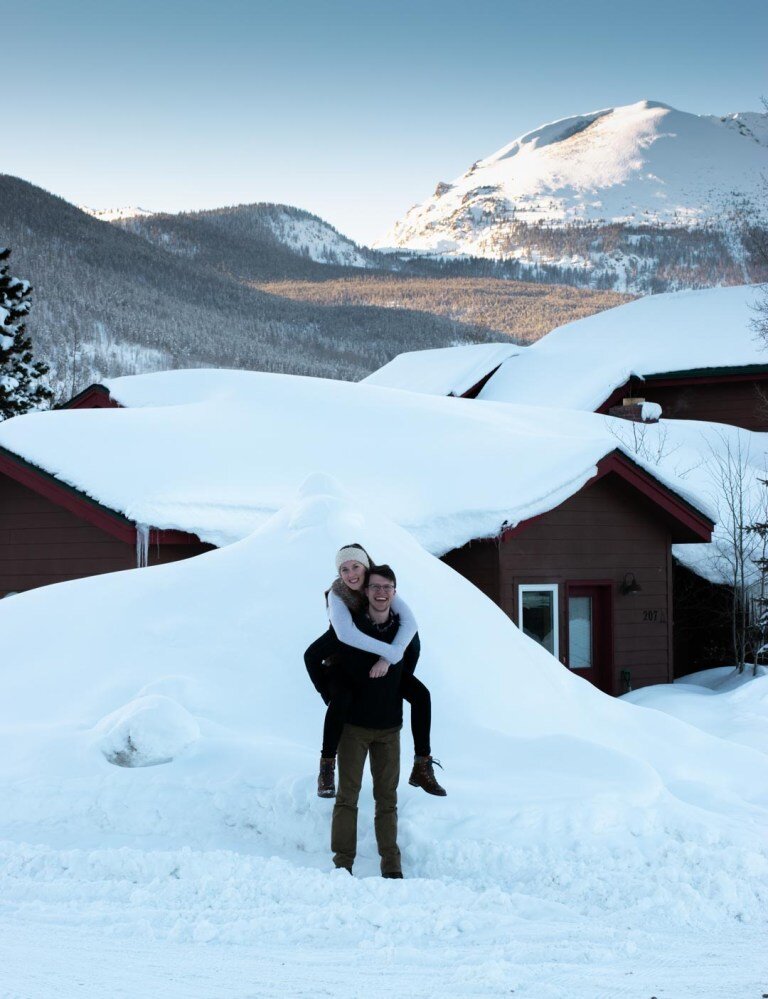
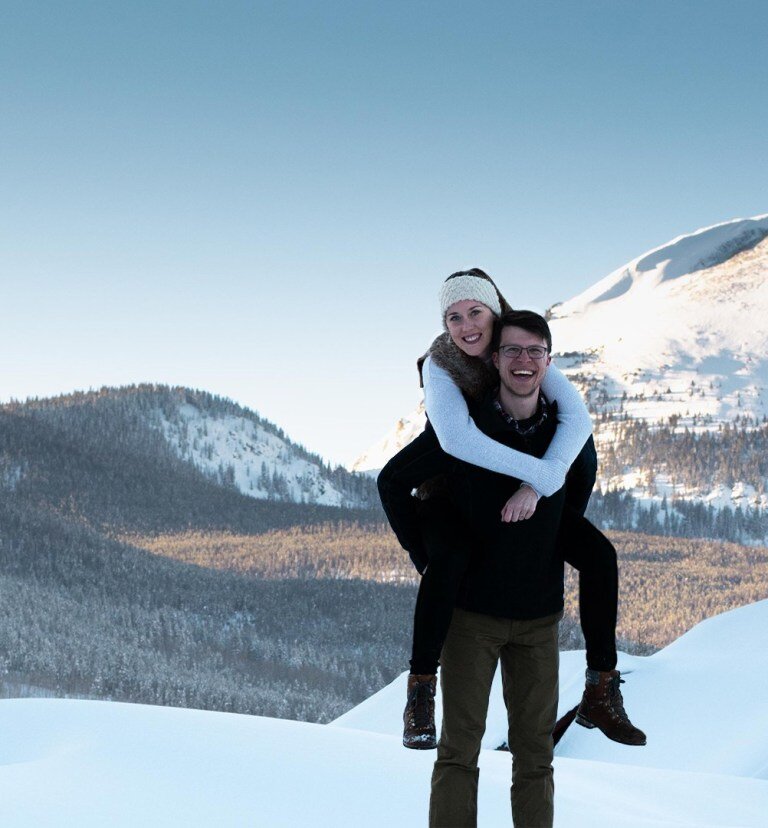
But first, I’ll bet you’re wondering who this cute engaged couple is... it’s me and my (now) husband! Well, towards the end of the summer of 2019, my then-boyfriend (now-husband!!!!) proposed to me! We wanted to find a way to cut costs and have a simple, fun, engagement photoshoot where we could call all the shots and have control over the edits/composition. So…you guessed it, we DIY’ed our hearts out!
DIY YOUR HEART OUT
Speaking of engagements and weddings (nice segue, Sarah) – what is one thing people always say about planning a wedding? It is $$$$ expensive! As a result, many brides-to-be like myself turn to a tried-and-true method for cutting down on costs – the Do-it-Yourself method (DIYs for days).
Now, aside from hot-gluing to my heart’s content, one area I was super excited to get my DIY on was when it came to engagement photos. If you’re recently engaged and looking to save 15% more on wedding planning, I recommend switching to a DIY engagement photoshoot. So grab a friend, relative, colleague, or random stranger (not recommended), and let’s get started!
PHONE A FRIEND
Quick Quiz: Who’s easier to talk to, your friend or your tripod? Although your tripod won’t disagree with you about your vision, it may just tip over due to a strong gust of wind. Your friend, on the other hand, is hopefully a bit more sturdy. Also, speaking from experience, it’s a heck of a lot easier to guide a friend into getting different angles of a shot than it is to meticulously tweak your tripod on repeat for an hour.
If you’re lucky to have a friend with some photography experience (aka Momma Bopp, in my case), that’s even better! Chat with your pal about your ideas, make sure you’re on the same page in terms of the amount of direction vs. creative freedom you want to give during the shoot, and, most importantly, have some fun! This will ideally be a stress-free excuse to hang out and flex those creative muscles together.
Tripods Can Be Friends Too
All that being said, tripods are a great alternative plan. Perhaps you’re going on vacation with your fiancé and you won’t have anyone with you to help out. By all means, go the tripod route! If that’s your plan, I would definitely recommend using some sort of remote to control your camera. This way you won’t have to run back and forth every ten seconds to reset the timer countdown – trust me, that’s no fun.
Many cameras nowadays will also have built-in wifi, allowing you to set up a direct connection with your smartphone. Take a look at the manual to figure out the specifics for your specific camera. This, paired with a flip-out screen on your camera body, and you’re golden. Pro-tip (but not really, just a reminder): always make sure you have a counter-weight on your tripod to avoid that wind-gust situation we talked about earlier.
DO YOUR RESEARCH
Once you’ve got a friend (or tripod) on board with your photoshoot idea, you’re basically done, right? Not exactly. Like any new project, it helps to have a bit of preparation under your belt before venturing off into the cold, dark world. (Though hopefully, you’re planning to shoot in the daylight.)
The same strategy applies here as well. Set aside some time leading up to the photoshoot to locate some potential photo spots around your area.
Unless this is something you’ve googled in the past, you’d be surprised how many people out there have something to say about the best photo locations around town. Take it from me – someone who didn’t do her research and didn’t plan out the photo locations for a shoot in the dead of winter in the middle of Colorado. Our cold fingers and toes were wishing I had a bit more foresight.
Daylight Is Key
It is well-known that some of the best times to schedule an outdoor photoshoot are sunrise and sunset. It is known! But those hours just before and just after the two main events can be glorious as well. Do some quick google-image searches for civil twilight, sunrise, golden-hour, and blue-hour.
Now that you’re convinced that these times produce some beautifully-lit photographs, grab a piece of paper (or a note-taking app on your phone), and write down the times when each of these ideal “hours” for the day of your photoshoot. Then get out there and put it into action!
Find Some Inspiration Photos
Since you won’t be the one behind the viewfinder giving direction, it will definitely help to plan ahead a bit when it comes to posing. Go ahead and pull up your Pinterest, or just google image search, and grab some inspiration pictures of different poses you like.
If it helps your process, I would recommend saving some of those pictures to your phone for easy reference on the day of the shoot. Unless you’ve got a photographic memory, in which case you’re a god, please teach me your ways!
BE YOUR OWN DIRECTOR
Now it’s time to get out there and put all this planning into action. It’s photoshoot time!
For some folks, it can be tricky to act like yourselves and avoid locking up in front of a camera pointed directly at your face by a stranger you’ve met once, or maybe twice. Here is a major perk of going the DIY engagement photoshoot route! It’s either just you and your fiancé in front of a tripod, or you two with a trusted friend.
Hopefully, this means acting naturally will come much more easily. So definitely go with the flow, and do what feels right for you and your boo. Take advantage of the fact that you can let your silly side show through, and don’t be afraid to laugh at yourselves. This should be a fun process!
Move Your Body
One critical tip I can share, as far as composition goes, is to incorporate movement. It’s amazing what a huge difference this really makes to the look and feel of a shot. Even something as simple as walking with a skip in your step or doing a fun lil’ twirl can create some nice movement in a photo. An added perk is it can even get you laughing, which will bring out your natural smiles.
But of course, at the end of the day, you get to be your own director and follow your own vision for the photoshoot. So bring along the things that make you and your fiancé unique. Bonus tip: bringing props can be a great way to help share your story!
HAVE FUN WITH POST-PROCESSING
Once you have completed steps A-Z above, you should have some great photos to show for it from your DIY engagement photoshoot session!
Here is where you get to incorporate your own artistic vision and edit to your heart’s content. Since you will have access to those raw image files (hopefully you shot in raw – if you have a DSLR, that is), you get to edit, re-edit, and manipulate those suckers in any way you see fit.
Depending on the skill level of your friend (or tripod), some photos may require more post-processing than others. But regardless, with the technology available via Lightroom, On1, or one of the many other photo-editing software tools on the market, you can achieve the edit of your dreams.
Before (left) and after (right)
Stick to an Overall Theme
If you plan to use these photos in some sort of photobook, or if you will be using more than one photo on your save-the-date, it may be good to stick with a theme. This will give your images that professional-quality feel that you would get back from a hired photographer. It will make everything look like one cohesive story. And who doesn’t love a good story?
With that being said, going the DIY engagement photoshoot route will give you the creative freedom to try out multiple edits on any given photo. Go wild! Have a blast trying new things you otherwise wouldn’t. At the end of the day these are your photos, and you are your harshest critic. Oh, and hey, you also just saved $500!
THANK YOUR FRIEND (or tripod)
Here comes the most important step. Be sure to thank your friend for the solid they did you by taking part in this photoshoot! Say thank you with a coffee date or take them out to a nice dinner, however you see fit. Just make it clear how much their help means to you. It could even be fun to create a custom thank you card with one of the photos they captured of you and your fiancé.
Speaking of Thank You’s
I would like to take a moment to thank you all, my readers! It means a lot that you are here, checking out what I have to say. To show my appreciation, I’m going to get back on track and do a better job of keeping up with this here blog.
Mark your calendars! My plan is to stick to a weekly posting schedule of adding new content every Sunday. So get ready, cause there is a butt-load of content coming your way.
Hey there! It’s bopphoto, aka Sarah Bopp, your internet pal and photographer. Lover of coffee, plants, nature, and old cameras.
Here you will find everything from my photoshoots, posts on tips & tricks, things that inspire me, and some behind the scenes content.
Peace & love,
Sarah
Looking for something?
-
February 2024
- Feb 5, 2024 Exploring the Heart of Your Brand: Woodland Lifestyle Photography for Outdoor Gear Feb 5, 2024
- Feb 2, 2024 Capturing the Essence of Adventure: Unveiling the Magic of Our Outdoor Commercial Photography Feb 2, 2024
-
September 2023
- Sep 27, 2023 Pacific Northwest Engagement Session Sep 27, 2023
-
April 2022
- Apr 20, 2022 Why book an engagement session? Apr 20, 2022
-
April 2021
- Apr 11, 2021 Spring Photo Shoot Inspiration Apr 11, 2021
-
March 2021
- Mar 7, 2021 Image within an Image Mar 7, 2021
-
February 2021
- Feb 21, 2021 Telling a Story with Photography Feb 21, 2021
- Feb 14, 2021 Finding Inspiration for Landscape Photography Feb 14, 2021
- Feb 7, 2021 Improve your Landscape Photography Feb 7, 2021
-
January 2021
- Jan 31, 2021 Top 10 Photo Spots In & Around Boston Jan 31, 2021
- Jan 24, 2021 DIY Engagement Photoshoot Jan 24, 2021
- Jan 17, 2021 Top 3 Fun Photography Tricks Jan 17, 2021
- Jan 10, 2021 Who is bopphoto? Jan 10, 2021


